Share this article:

Drupal and Next.js
Drupal is a popular and powerful content management system (CMS) that makes it easy to create editorial workflows and interfaces that meet your specific needs. It is modular based and is highly customisable with a sisable community and technological maturity and could be used to create full stack web applications. The trend recently, in web development in general, and consequently in Drupal development is to use the technology headless - only as a powerful API, and detaching it from the user interface, where other technologies such as react and Next.js excel at.
Next.js is a popular react framework for building react applications which leverage server-side rendering. It has some features that make it well-suited for headless Drupal projects, including automatic code splitting, optimised performance, and server-side rendering.
In this tutorial we are going to first create a drupal app for creating and storing coffee drinks. We are then going to create a Next js app, fetch the available data from our drupal app and finally show a list of coffee drinks. We assume that you already have some experience with Drupal and Next.js
Drupal app
Install Drupal
We start by creating a new Drupal site. In our example we are going to create a web app that will show different coffee options. To create the drupal site we will use docksal, which is already setup in our machine. We just need to run:
$ fin project createWe are then prompted for app name:
1. Name your project (lowercase alphanumeric, underscore, and hyphen):
drupal-headless-coffee-drinks
We are then prompted for app name:
Drupal 9 (Composer Version)Now we continue with the installation and finally your app will be created via the CLI and the terminal will show you a url link to your newly created app
Open http://drupal-headless-coffee-drinks-app.docksal in your browser to verify the setup.
Look for admin login credentials in the output above.
DONE!  Completed all initialization steps.
Just above the message with the url to your app, we see credentials for the admin user of your drupal web app. Keep that information! Now we copy the credentials and navigate to the web app login
(drupal_app_url)/user/login
# in our case: http://drupal-headless-coffee-drinks-app.docksal/user/login
Add Next.js module
Run the following command to install the Next.js module and dependencies.
$ composer require drupal/nextEnable API modules
- Visit /admin/modules
- Enable the following modules: Next.js and Next.js JSON:API.
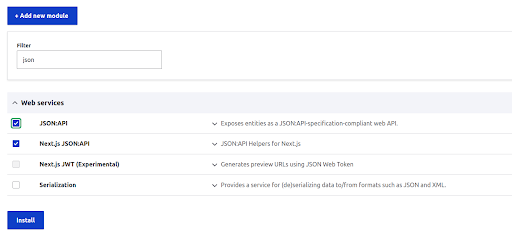
Create coffee drink content type and add data
Now let’s create our coffee drinks data. First we need to create our coffee drink content type. To do that admin/structure/types and click on Add content type, as an example, fill in the following:
Name: Coffee Drink, then:
- Click on Save and Manage Fields.
- Click on Add field
- Choose Text Plain
- In the Label Field type “description”
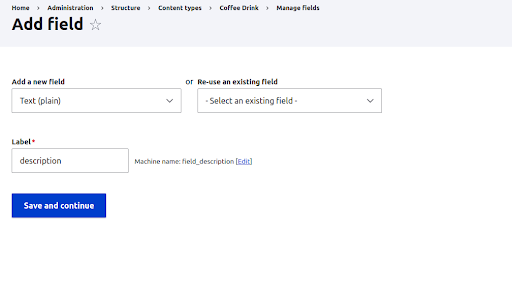
Then let’s add an Image field as well:
- Click on add field
- You can re-use and existing field (from article content typewhich is created by default)
Finally, let’s create some content in our database. To do that navigate to /admin/content and click on Add Content. Now we choose Coffee Drink and fill in the fields
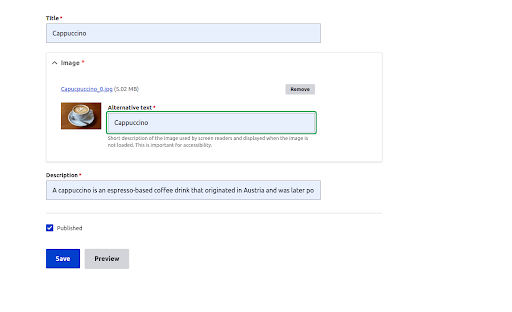
I did the same for Americano, Espresso and Mocha and the final result is that I have 4 items created as “Coffee drink” type in our database. Final result is 4 content items - Coffee drinks stored in our CMS. Now let’s see how to fetch them in our Next.js, front-end app.
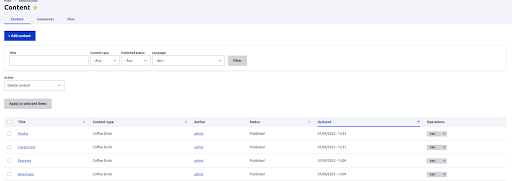
Next.js app
Let’s create our next app with the following parameters when prompted
$ npx create-next-app
✔ What is your project named? … next-coffee-app
✔ Would you like to use TypeScript with this project? … No / Yes
✔ Would you like to use ESLint with this project? … No / Yes
Install Tailwind
Next, optionally, install tailwind to the project in order to style the application seamlessly later. To install tailwind did the following steps
- npm install -D tailwindcss postcss autoprefixer
- npx tailwindcss init -p
- In tailwind.config.js add this:
/** @type {import('tailwindcss').Config} */
module.exports = {
 content: [
   "./pages/**/*.{js,ts,jsx,tsx}",
   "./components/**/*.{js,ts,jsx,tsx}",
 ],
 theme: {
   extend: {},
 },
 plugins: [],
} - Go to global.css deleted everything and added the following directives to our CSS:
@tailwind base;
@tailwind components;
@tailwind utilities;
Create ENV
Create .env file and and added variables which point to our API url:
NEXT_PUBLIC_DRUPAL_BASE_URL=http://drupal-headless-coffee-drinks-app.docksalFetch coffee drinks data and pass it to component
// pages/index.tsx
import Head from "next/head";
import { GetStaticPropsResult } from "next";
import { DrupalNode } from "next-drupal";
import { DrupalClient } from "next-drupal";
import CoffeeDrinkList from "../components/CoffeeDrinkList";

const drupal = new DrupalClient(process.env.NEXT_PUBLIC_DRUPAL_BASE_URL);

interface IndexPageProps {
 nodes: DrupalNode[];
}

export default function IndexPage({ nodes }: IndexPageProps) {
 return (
   <>
     <Head>
       <title>Next.js for Drupal</title>
       <meta
         name="description"
         content="A Next.js site powered by a Drupal backend."
       />
     </Head>
     <CoffeeDrinkList drinks={nodes} />
   </>
 );
}

export async function getStaticProps(): Promise<
 GetStaticPropsResult<IndexPageProps>
> {
 const nodes = await drupal.getResourceCollection<DrupalNode[]>(
   "node--coffee_drink",
   {
     params: {
       "filter[status]": 1,
       "fields[node--coffee_drink]":
         "title,field_image,field_description,created",
       include: "field_image,uid",
       sort: "-created",
     },
   }
 );
IndexPage returns a JSX element representing a web page. The web page contains a Head component from the next/head module, which is responsible for setting the title and description of the page. The web page also contains a CoffeeDrinkList component, which is passed an array of drinks as a prop. The IndexPage function is passed an object containing an array of DrupalNode objects as its sole argument.
We also have a function - getStaticProps, which is used to generate the props for the IndexPage component. The getStaticProps function fetches a collection of nodes from a Drupal backend (in this case coffee drinks) using the DrupalClient class. The nodes are filtered by status and sorted by creation date, and the function returns an object containing the nodes as props for the IndexPage component.
Show data as list
// components/CoffeeDrinksList.tsx
 import { DrupalNode } from "next-drupal";

 interface CoffeeDrinkListProps {
   drinks: DrupalNode[];
 }

 const CoffeeDrinkList = ({ drinks }: CoffeeDrinkListProps) => {
   return (
     <div className="h-full bg-white">
       <h1 className="mb-10 text-6xl font-black text-center">
         List of Coffee Drinks
       </h1>
       <div className="grid grid-cols-3 gap-4 items-center justify-items-center">
         {drinks?.length ? (
           drinks.map((drink) => (
             <div
               key={drink.id}
               className="max-w-sm rounded overflow-hidden shadow-lg m-2"
             >
               <img
                 className="w-full h-[300px]"
                 src={`${process.env.NEXT_PUBLIC_DRUPAL_BASE_URL}${drink.field_image.uri.url}`}
               />
               <div className="px-6 py-4">
                 <div className="font-bold text-xl mb-2">{drink.title}</div>
                 <p className="text-gray-700 text-base">
                   {drink.field_description}
                 </p>
               </div>
               <div className="px-6 pt-4 pb-2">
                 <span className="inline-block bg-gray-200 rounded-full px-3 py-1 text-sm font-semibold text-gray-700 mr-2 mb-2">
                   Created: {drink.created}
                 </span>
               </div>
             </div>
           ))
         ) : (
           <p className="py-4">No nodes found</p>
         )}
       </div>
     </div>
   );
 };

 export default CoffeeDrinkList;
CoffeeDrinkList is a component which takes an array of DrupalNode objects as a prop and returns a JSX element representing a list of coffee drinks. The component is passed an object containing an array of DrupalNode objects as its sole argument. The component maps over the array of DrupalNode objects, creating a new JSX element for each node. Each JSX element represents a single coffee drink and displays the title, description, and creation date of the drink, as well as an image of the drink.
If the drinks array is empty or null, the component displays a message indicating that no nodes were found.
The component also includes some CSS classes that are used to style the elements. These classes are from the tailwindcss library.
Final results
Now run the next app and see the final result
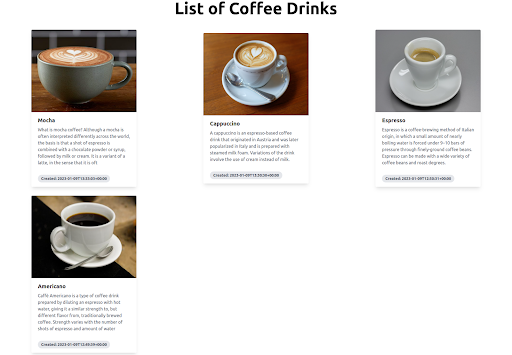
$ npm run devWe ended up with a page showing all coffee drinks title, description, image and created date and time - data we fetched from our drupal app.
Summary
In the article example we saw how to create a drupal app, add content types and data for that content type, expose our drupal api and consume it with a next js app to show a list of coffee drinks fetched from the database to our users. For more complex solutions, which might require authentication, adding, deleting and updating data, refer to the documentation of Next.js for Drupal: https://next-drupal.org/
SUBSCRIBE TO OUR NEWSLETTER
Share this article:


.png&w=3840&q=75)


